Component Composition with Spin 4.0
 7 min read
Thanks to the WebAssembly Component Model we can stitch together multiple WebAssembly Components. Reusing Wasm Components boost developer velocity dramatically while language barriers vanish. In this hands-on article, I’ll explain how you can compose Wasm Components using Spin 4.0.
What You Need To Follow Along
I’ll try to keep things as simple as possible. That’s why we’ll implement both components using Rust, resulting in the following - short - list of requirements:
- Rust (version
1.97.2or newer) - The
wasm32-wasip2target for Rust (rustup target add wasm32-wasip2) - Spin CLI (version
4.0.2or newer)
What We’ll Build
For the sake of this article, we’ll implement a simple Spin application which will respond to incoming HTTP POST requests. We’ll validate the payload sent as part of the request and classify the importance of the message provided. The classification will be returned back to the callee as classification property on a JSON object.
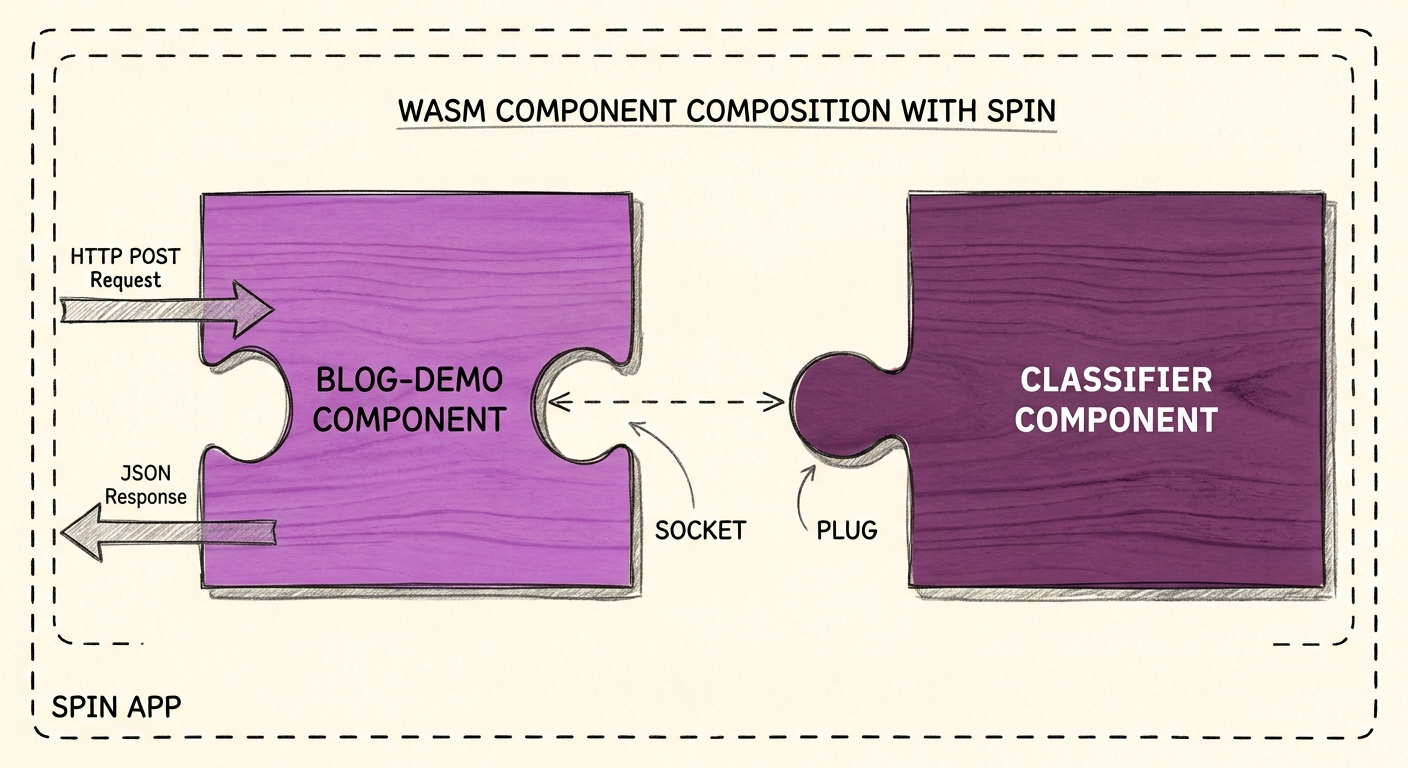
Wasm Composition Illustration - Vibe-Crafted with Gemini
We’ll implement the classification itself as a self-contained Wasm component. The entire HTTP-releated code and control flow remains in the bounds of the top-level Wasm Component created by Spin CLI as part of creating the project itself.
Scaffolding The Spin Application
Creating a new application with Spin is as easy as executing spin new. We provide the desired template (http-rust) using the -t flag along with the application name and accept defaults for remaining template parameters by adding the -a (or --accept-defaults) flag:
spin new -t http-rust -a blog-demo
# move into the blgo-demo folder
cd blog-demo
Creating The classifier Wasm Component
Instead of creating the classifier Wasm component using cargo new and customizing the Cargo.toml, I’ll use a custom template for Spin which I’ve created a few days ago.
To install the template, use these commands:
spin templates install \
  --git https://github.com/ThorstenHans/spin-headless-components
Once done, you can add the classifier component to the blog-demo application using spin add:
spin add -t headless-rust classifier -a
Using the headless-rust template gives you the following advantages:
- ✅ Seamless integration with
spin build - ✅
wit-bindgenset as dependency - ✅ Binding generation macro in place
- ✅ WIT world Skeleton
- ✅ Proper crate configuration
A Quick Sanity Check
If you’re following along, the contents of the blog-demo folder should now look like this:
.
├── Cargo.toml
├── classifier
│   ├── Cargo.toml
│   ├── src
│   │   └── lib.rs
│   └── wit
│       └── world.wit
├── spin.toml
└── src
    └── lib.rs
Matches yours? Good! If not, try to check the commands you executed and ensure, you’ve used the same templates as I did.
Defining The WIT World
Let’s get moving! We’ll start by changing the contents of ./classifier/wit/world.wit and make our component export the classify interface as part of the classifier world:
package thorstenhans:[email protected];

interface classify {
    enum classification {
        urgent,
        neutral,
        relaxed
    }

    classify: func(input: string) -> classification;
}

world classifier {
    export classify;
}
If you’ve never worked with WIT before, consider reading this section of the WebAssembly Component Model book.
Implementing The classifier
With the WIT world being defined, we can move on and provide the actual implementation.
If your IDE or code editor has proper Rust tooling installed, you should already see a bunch of errors being reported as part of the ./classififer/src/lib.rs file. This is because we’ve changed the WIT world and wit-bindgen already regenerated the binding code behind the scenes. If your environment does not report any errors yet, you might wanna run spin build in the blog-demo folder which will try to re-compile both components.
Okay, let’s now address the broken implementation of the classifier component:
use crate::bindings::exports::thorstenhans::components::classify::{
    Classification, Guest,
};

mod bindings {
    wit_bindgen::generate!({
        path: "wit/world.wit",
    });
    use super::ClassifierComponent;
    export!(ClassifierComponent);
}
struct ClassifierComponent;

impl Guest for ClassifierComponent {
  fn classify(input: String) -> Classification {
    return match input.to_lowercase() {
      x if x.contains("urgent") ||
        x.contains("asap") ||
        x.contains("immediately") => {
            Classification::Urgent
        }
      x if x.contains("later") ||
        x.contains("whenever") ||
        x.contains("someday") => {
          Classification::Relaxed
        }
      _ => Classification::Neutral,
    };
  }
}
Running spin build once again, it should complete successfully, indicating that you’ve just created a working Wasm Component 🎉.
Defining The Component Dependency In spin.toml
Looking at the Spin application, there is one additional modification we’ve to apply in spin.toml, before we could look at the code of our HTTP-triggered Spin component.
We’ve to specify the classifier component as a dependency of the blog-demo component itself. This is done by adding a new table to the application manifest:
# existing spin.toml...
[component.blog-demo.dependencies]
"thorstenhans:[email protected]" = {
  path = "./classifier/target/wasm32-wasip2/release/classifier.wasm"
}
Binding Generation - Again 🤘🏼
Obviously, we need some kind of glue code within the blog-demo component as well. The Spin SDK streamlines this process as we don’t have to use the macro defined by underlying wit-bindgen.
Instead all we’ve to do is adding the spin_sdk**::**dependencies!(); macro call in src/lib.rs. Personally, I prefer having it immediately before the service definition:
use spin_sdk::http_service;

spin_sdk::dependencies!();

#[http_service]
// ...
You know the play! Run a spin build again and It will generate the bindings for the blog-demo component based on the dependency we added to our application manifest earlier.
Using the classifier
As our interface exports a function called classify, we can bring that one straight into scope and use it. We’ll hardcode a value for now, ensure it compiles, before we take care of the HTTP related stuff:
use crate::thorstenhans::components::classify::{
  classify, Classification
};

spin_sdk::dependencies!();
#[http_service]
async fn handle_blog_demo(_req: Request) -> anyhow::Result<impl IntoResponse> {
  let classification = match classify("Buy Milk ASAP!") {
    Classification::Urgent => "Urgent".to_string(),
    Classification::Relaxed => "Relaxed".to_string(),
    Classification::Neutral => "Neutral".to_string(),
  };
  Ok(Response::builder()
    .status(200)
    .header("content-type", "text/plain")
    .body(classification))
}
Finishing The blog-demo Implementation
Let’s first add serde and serde_json:
cargo add serde -F derive
cardo add serde_json
Here the final code for the blog-demo component. We’ll iterate over some of the additions below:
use serde::{Deserialize, Serialize};
use spin_sdk::http::body::IncomingBodyExt;
use spin_sdk::http::{IntoResponse, Json, Method, Request, Response, StatusCode};
use spin_sdk::http_service;
use crate::thorstenhans::components::classify::{
    classify, Classification
};

spin_sdk::dependencies!();

#[derive(Deserialize)]
pub(crate) struct RequestModel {
    pub message: String
}

#[derive(Serialize)]
pub(crate) struct ResponseModel {
    pub classification: String
}

#[http_service]
async fn handle_blog_demo(req: Request) -> anyhow::Result<impl IntoResponse> {
  if req.method() != Method::POST {
        return Ok(StatusCode::METHOD_NOT_ALLOWED.into_response());
  }
  let body_stream = req.into_body();

  let Ok(bytes) = body_stream.bytes().await else {
    return Ok(StatusCode::BAD_REQUEST.into_response());
  };
  let Ok(payload) = serde_json::from_slice::<RequestModel>(&bytes) else {
    return Ok(StatusCode::BAD_REQUEST.into_response());
  };
  if payload.message.is_empty() {
    return Ok(StatusCode::BAD_REQUEST.into_response());
  }

  let classification = match classify(&payload.message) {
        Classification::Urgent => "Urgent".to_string(),
        Classification::Relaxed => "Relaxed".to_string(),
        Classification::Neutral => "Neutral".to_string(),
  };

  let res_payload = ResponseModel { classification };

  Ok(Json(res_payload).into_response())
}
In the final implementation, we’ve added:
RequestModelandResponseModelto create struct instances from incoming HTTP request payloads and to produce the desired response payload as JSON- We’ve validated incoming request payloads before we hand the actual data over to the
classifiercomponent. - If requests use methods other than
POST, we return a405 - The classification is now provided as response payload using proper
content-typeheader
Testing The Application
Finally, we can test our Spin application by running it on our local machine with spin up:
spin up
Here a bunch of curl requests for testing purposes, along with their responses:
# an urgent message
curl -XPOST -d '{"message": "Buy milk today"}' \
  -H 'content-type:application/json' \
  localhost:3000
# {"classification":"urgent"}

# a relaxed message
curl -XPOST -d '{"message": "Someday we should buy milk"}' \
  -H 'content-type:application/json' \
  localhost:3000
# {"classification":"relaxed"}

# a neutral message
curl -XPOST -d '{"message": "Buy milk"}' \
  -H 'content-type:application/json' \
  localhost:3000
# {"classification":"neutral"}
Grab The Source Code
As always, the entire sample is available on GitHub as well. You can find the Git repo at thorstenhans/component-composition-spin.
Recap
Component composition in Spin 4.0 makes stitching together decoupled WebAssembly components feel remarkably smooth:
- Scaffolding: Using the custom Spin template (headless-rust`), you can quickly add dedicated sub-components without huge manual configuring efforts.
- Interface Definitions: WIT files remain the single source of truth—defining clean exports (like our
classifyinterface) that cross component boundaries seamlessly. - Component Dependencies: Setting
[component.blog-demo.dependencies]inspin.tomlallows keeping track of dependencies at a central place - Auto-generated Glue Code: Calling
spin_sdk::dependencies!()eliminates the friction of manually adding binding macros, pulling imported interfaces straight into scope.
By decoupling the core classification logic into its own Wasm component, we kept the HTTP control flow lean, standard, and easy to maintain—all powered by the WebAssembly Component Model. 🚀