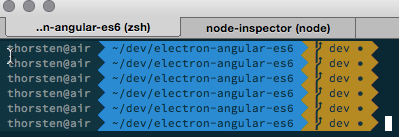
When people ask me why I’m using a Mac instead of a Windows device for doing all my stuff, I always end up with a single but significant reason: I have a real shell! Most hardcore Windows fans are answering to this comment: “Well there is PowerShell” or: “Hey we have Cygwin” but to be honest, those are no alternatives to a real shell 🙂
A few people asked me over the time which configuration/theme and stuff I use within my terminal and because I’ve to set up a new device in these days (a stunning brand new 13" MBP Retina with ForceTouch)

I’ll use the chance to explain my setup a bit…
iTerm2
iTerm2 is an alternative to Apple’s OOB Terminal App. Both can be installed side by side. So no worry, you will not break anything when installing it.
Either you can download iTerm2 from here or you can install it using homebrew by executing
# install cask if you haven't
brew install cask

# install iTerm2
brew cask install iterm2
Installing Solarized Theme for iTerm2
Make iTerm2 comfortable by applying the Solarized theme.
brew install wget
cd ~/Downloads

wget https://raw.github.com/altercation/solarized/master/iterm2-colors-solarized/Solarized%20Dark.itermcolors
After downloading the theme open iTerm2 and import the downloaded solarized theme through
iTerm -> Preferences -> Profiles -> Colors -> load presets -> Import
OH-MY-ZSH
OH-MY-ZSH is a replacement for the default bash on macOS. OH-MY-ZSH also runs side-by-side with bash, so again no worries.
Install it by invoking
curl -L https://raw.github.com/robbyrussell/oh-my-zsh/master/tools/install.sh | sh
After installation has finished open ~/.zshrc in any editor and set the theme for ZSH ZSH_THEME="agnoster".
Installing PowerLine
Powerline font is responsible for bringing some kind and helpful icons to the terminal. For example, it’s displaying branches in the following way

You can download the font from here, install this font on your system and then apply it in iTerm2 through
iTerm -> preferences -> profiles -> text
I’ve chosen 11pt as font-size for my setup, so apply PowerLine for Regular Font and Non-ASCII Font by clicking each Change Font button and select the PowerLine font.
More Power with Plugins
OH-MY-ZSH ships with support for plugins. Their documentation on GitHub is listing which plugins were currently part of the release. By default, those plugins were not enabled. To enable them, you’ve to list them inside of your .zshrc File. I use only a few plugins to keep things simple.
Open your .zshrc file and look for plugins=(), once you find that line, list all plugins you want to use within the braces as shown here: plugins=(git bower sublime brew history node npm sudo web-search).
Plugins can either extend the auto-completion tab, create new key bindings or create new aliases within your terminal. So take a minute and read through the descriptions of those plugins before enabling them. It’s worth reading the description for each plugin, because you may end up with being even more productive.
That’s it for iTerm, but
Now you’ve installed and configured a good starting point. However, you should not stop here. I’ve written another article on how to setup NVM on your system to switch and maintain multiple Node.js installations easily. Go and read the article now!